
Step-by-step help for getting the most out of NoteMagic
Creating, formatting, and organizing note content.
Tap the + button on the notes list to start a new note. Type a title and body text just like any text editor — formatting (bold, italic, underline, strikethrough, color) is available from the toolbar above the keyboard whenever text is selected.
If NoteMagic closes unexpectedly while you're in the middle of editing — Android can end an app's process outright to free up memory, with no warning — the note you were working on, whether brand new or already saved, reopens automatically with your unsaved changes intact the next time you launch the app. There's nothing to set up; it just works in the background.
Checklists, bulleted lists, and numbered lists are all the same underlying content in NoteMagic, so you can switch a list from one style to another without retyping it:
This is handy when a checklist evolves into general reference notes (convert it to bullets) or when you need to turn a loose set of bullets into ordered steps.
List items can be nested to show sub-steps or sub-points:
Nested items keep their own checklist/bullet/number state, so you can mix, for example, a top-level checklist item with numbered sub-steps underneath it.
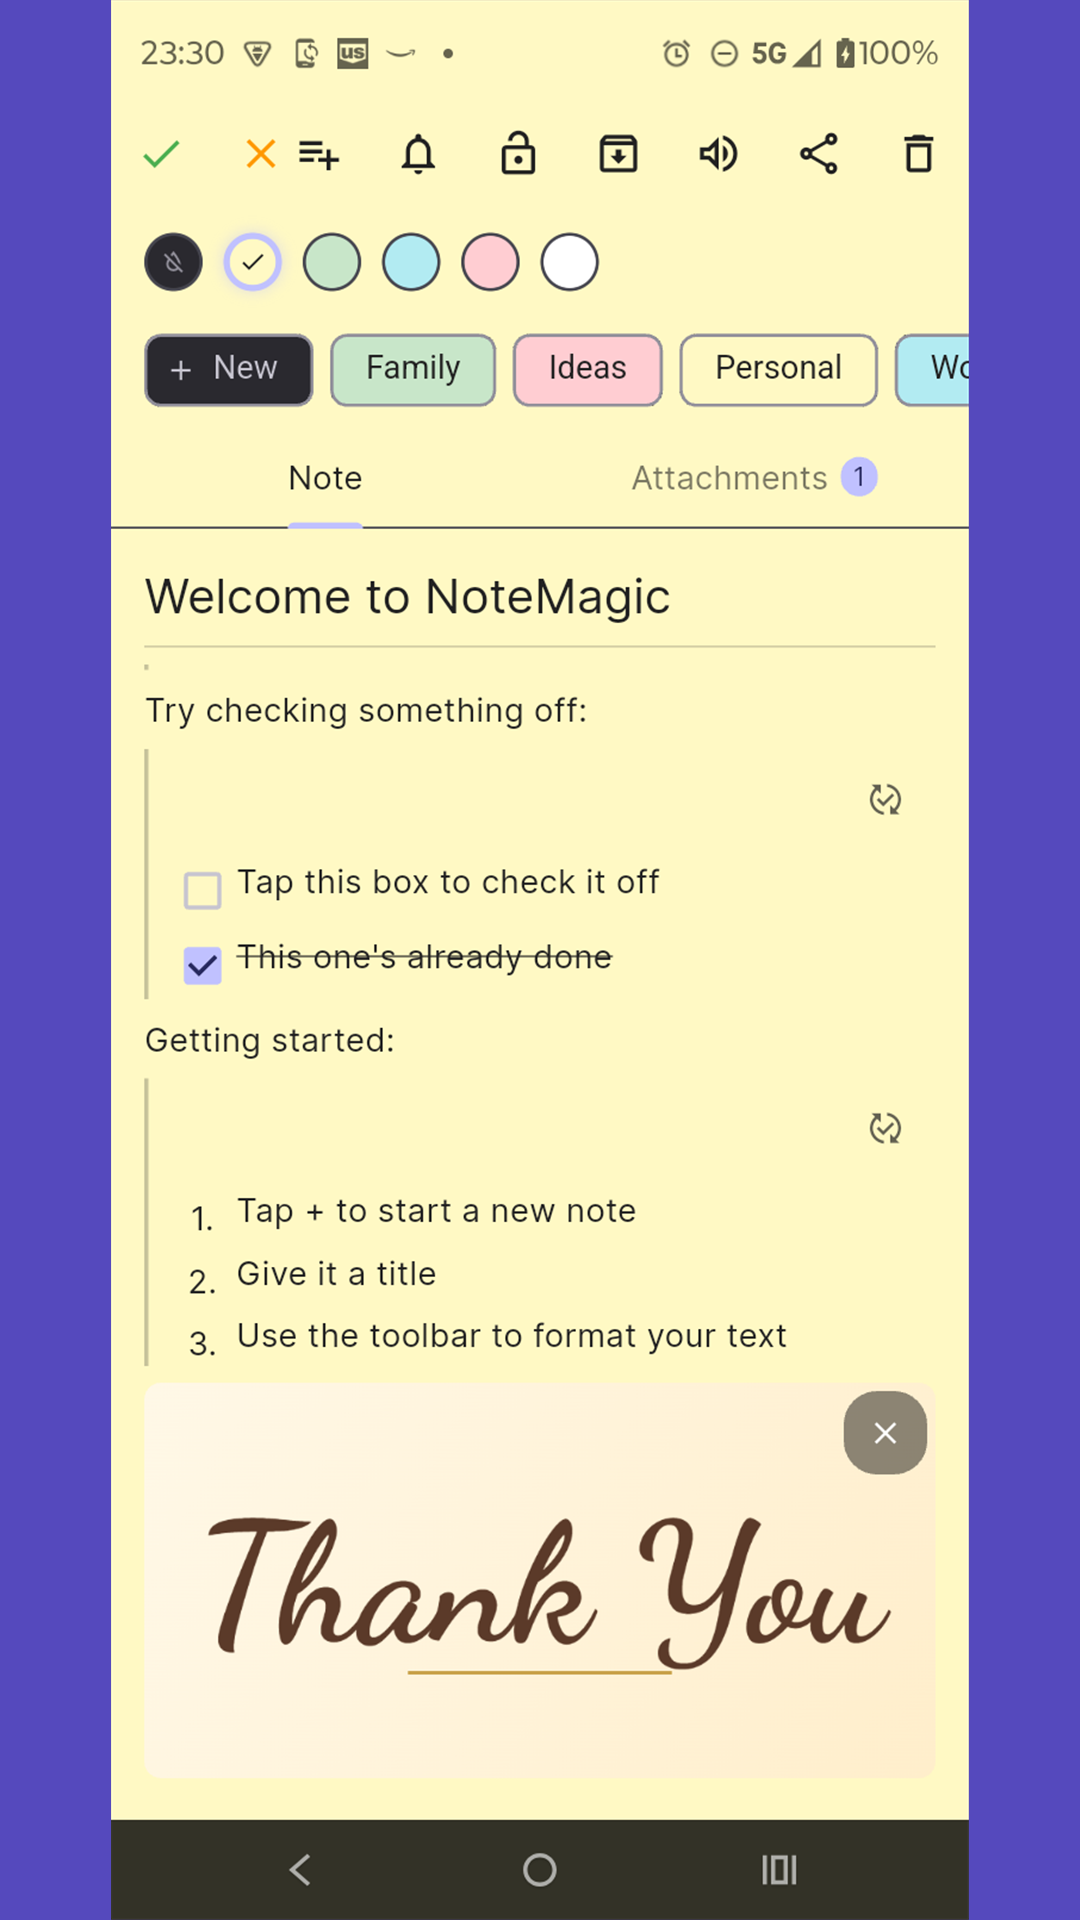
Checklists, numbered lists, and embedded images in a single note.
Keeping a growing list of notes easy to navigate.
Assign a category to any note to group related notes together and filter the notes list down to just that category. Categories can be created, renamed, and color-coded from the category editor.
Pin important notes to keep them at the top of the list. Switch between list and grid layout from the toolbar at the top of the notes list, whichever is easier to scan for you.
Set a one-time reminder on a note from its overflow menu to get a notification at a specific date and time — handy for notes tied to a task or appointment.
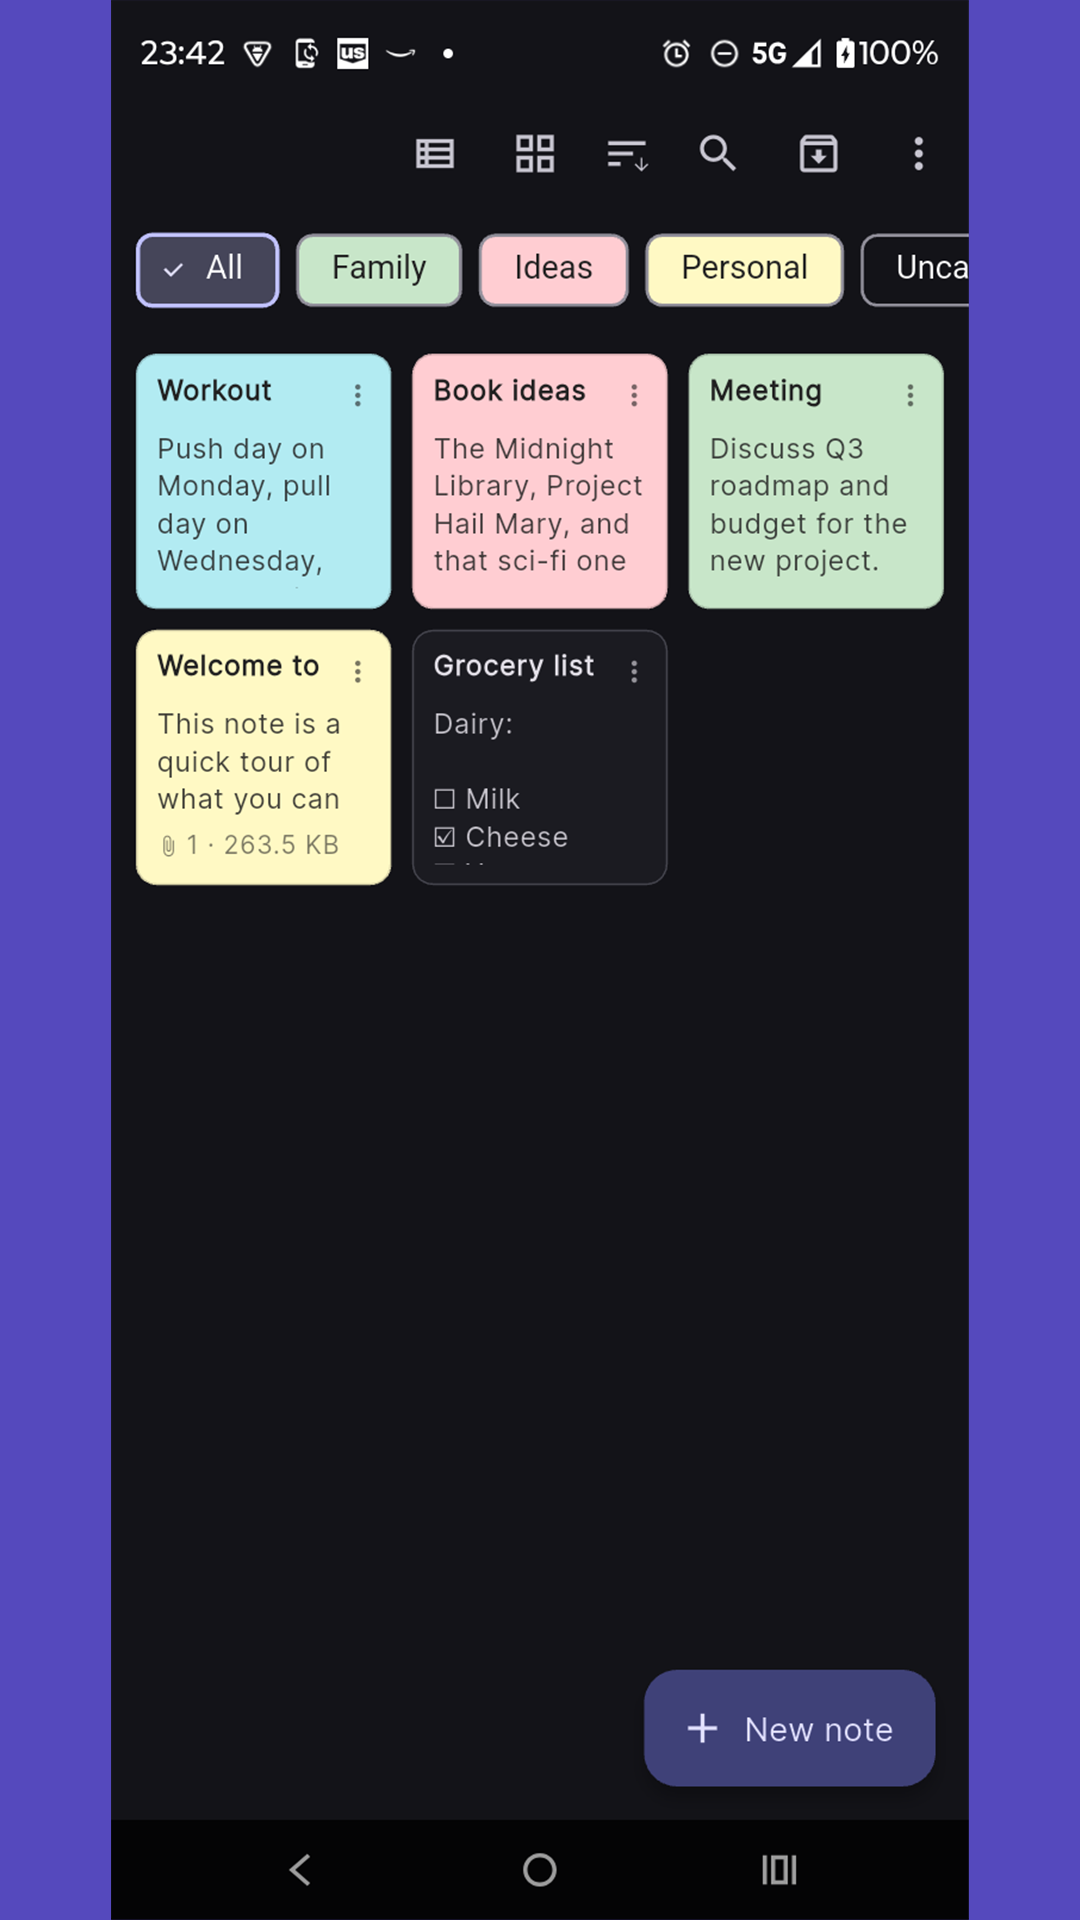
Grid view with categories and pinned notes.
Getting content into and out of NoteMagic.
From almost any other app, select text and use Android's Share menu, then choose NoteMagic — this creates a new note pre-filled with the shared text, ready to edit and save.
Paste or type a web address inside a note and it becomes a tappable link automatically. You can also add a link to selected text from the formatting toolbar, edit an existing link's destination, or remove it without deleting the underlying text.
Use the share action from a note's overflow menu to send its content to another app — email, messaging, or anywhere else Android's share sheet offers.
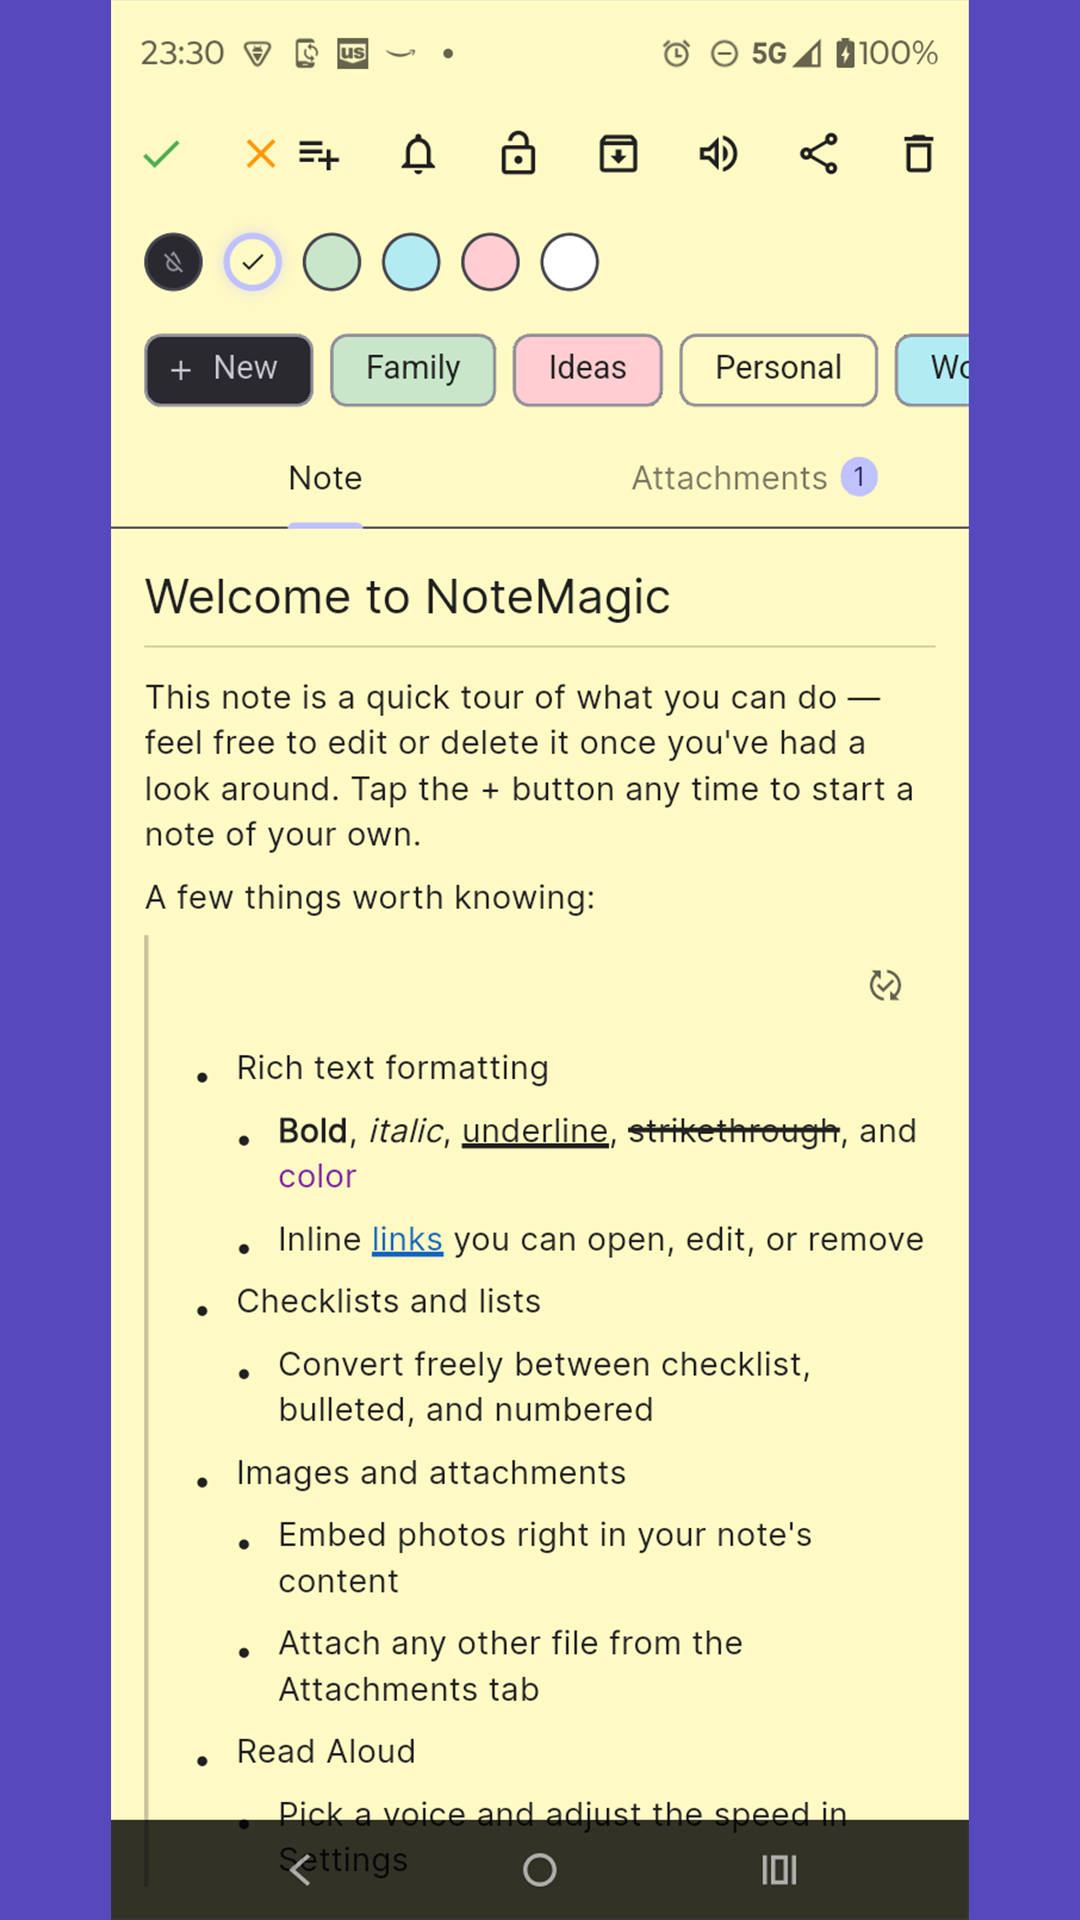
Rich text formatting and an inline link inside a note.
Protecting your notes and moving them to a new device.
Open Settings → Backup/Export → Back up everything to create a single
.kn file containing all of your notes, categories, and attachments (including
embedded images).
.kn backup
is now safely stored in your Google account, independent of the device itself..kn backup file you saved earlier and confirm the restore.This works the same way whether you're restoring on the same phone, a replacement device, or a new tablet — anywhere you're signed into the Google account that has the backup.
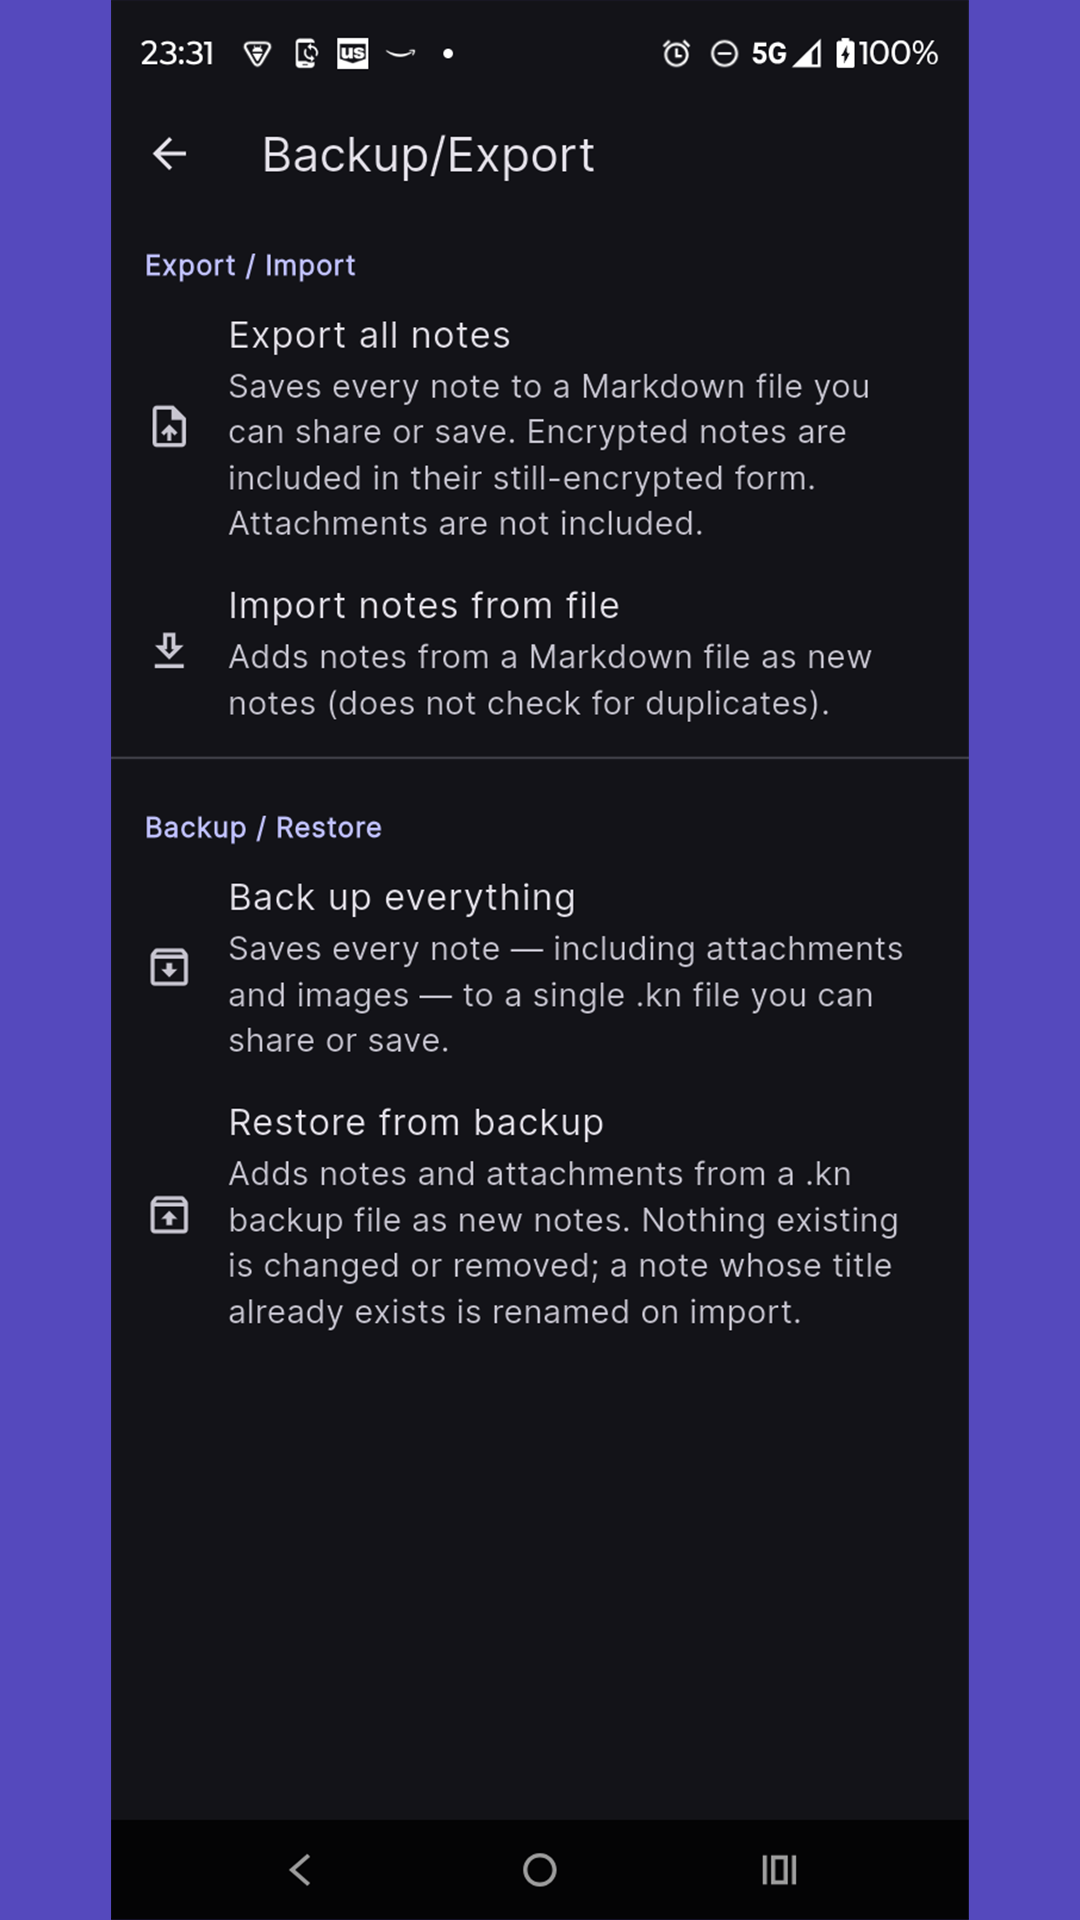
The Backup/Export screen, with Google Drive available as a share target.
Restoring merges into your existing notes rather than replacing them outright. If a note in the backup exactly matches the title of a note you already have, NoteMagic keeps both by renaming the incoming one, so nothing is silently overwritten.
Two ways to keep specific notes private.
Locking a note hides its content behind your device's own screen lock or app PIN. It's quick to set up from a note's overflow menu and is meant to keep a note out of casual view — for example, if someone else picks up your phone.
For stronger protection, a note can be fully encrypted with its own password using AES-256-GCM, processed entirely on your device. Unlike the PIN lock, an encrypted note's content is unreadable without that specific password — including to NoteMagic itself.
There is no recovery option. Because the password never leaves your device and is never stored anywhere, losing it means the note's content cannot be recovered by anyone, including the developer. Keep encrypted-note passwords somewhere safe.
File attachments and embedded images are not encrypted, even on a locked or encrypted note — only the text content is protected.
Dictate into a note instead of typing.
Tap the microphone icon while editing a note's title, a text block, or a checklist/list item to start dictating. What you say appears as text in that field as you speak, using your device's built-in speech recognition. Tap the mic icon again to stop manually at any time.
Say "new line" while dictating to insert a line break without touching the keyboard. In a plain text block this inserts a line break in place; in a checklist or list item, it ends the current item and starts a new one — the same as pressing Enter.
Android's speech recognizer can stop listening after a pause, or even in the middle of a long, continuous sentence — this is a quirk of the underlying recognizer itself, not something unique to NoteMagic; it showed up consistently across multiple test devices from different manufacturers. In practice this means a long, uninterrupted dictation can occasionally lose a few words right around where the recognizer decided to stop and restart.
To keep this from interrupting your flow, NoteMagic automatically resumes listening when the recognizer stops on its own — controlled by the Voice Input → Auto restart recording setting, which is on by default. With it on, a mid-sentence stop is usually invisible: recording picks back up in the background and you can keep talking. Turning it off means you'll need to tap the mic icon again yourself every time the recognizer stops, which testing showed leads to a noticeably rougher experience for longer dictation — so unless you have a specific reason to want manual control over every listening session, it's worth leaving this on.
Depending on your device, its settings, and connectivity, speech recognition may happen entirely on your device or be sent to an online recognition service (typically Google) — NoteMagic uses Android's standard speech recognition system and doesn't control, or have visibility into, which one a given device or session uses. NoteMagic itself never records or stores audio; only the resulting text becomes part of your note, exactly as if you'd typed it. See the Privacy Policy for the full details.
Have any note read back to you.
Open a note and use the Read Aloud control (usually in the toolbar or overflow menu) to start playback. You can pause, resume, or stop at any time.
Read Aloud settings let you pick from the voices installed on your device and adjust the reading speed to whatever's comfortable — faster for a quick skim, slower for dense notes.
By default, Read Aloud uses your device's built-in text-to-speech voices, which process everything locally and never send anything anywhere. You can optionally turn on online voices in Settings for higher audio quality — doing so sends the text of the note being read to your device's voice provider (typically Google) to generate the audio. This is off by default and requires you to explicitly opt in. See the Privacy Policy for details.