Step-by-step walkthroughs for Benchwork Ballistics. New to a term? See the glossary.
Getting started
From first launch to your first solution.
The first time you open the app, read the Terms, scroll to the end and tap I agree.
On the empty Solution screen, tap Add your rifle. Step 1 asks for your rifle's name,
sight height (center of the bore to center of the scope), twist rate,
zero range, and the turret and reticle settings of your optic. Tap
Next: add a load.
Step 2 is your load. Tap Choose from library to fill in the bullet's weight,
diameter and ballistic coefficient, then enter your muzzle velocity. A chronograph reading of your
own ammunition is best. Tap Finish.
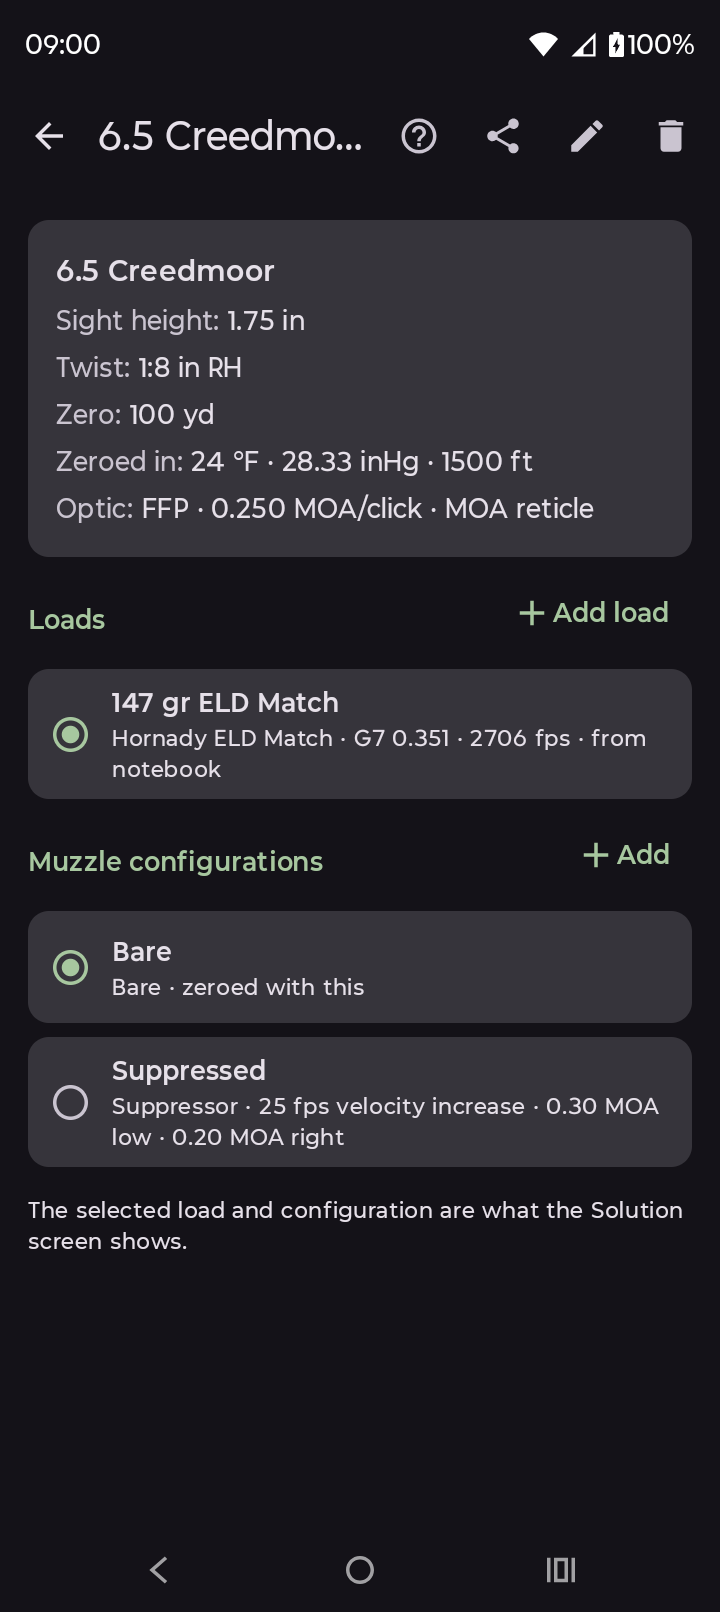
A rifle's page: its details, loads, and muzzle configurations.
Your rifles live under Profiles. Tap one to see its loads and configurations, or the check
mark to make it the active rifle for the Solution screen.
Reading your solution
The Solution screen is home.
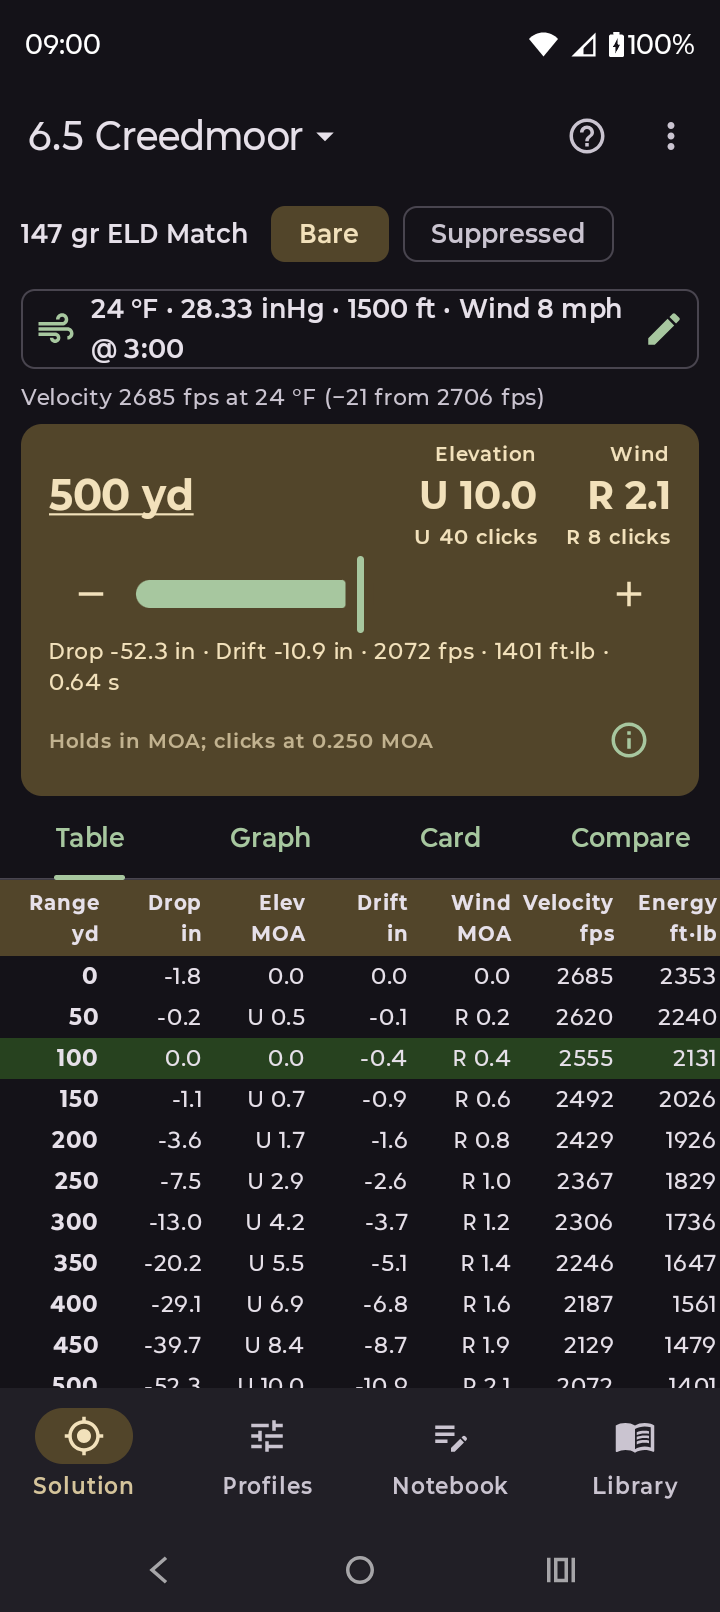
Holds for one distance, with the whole trajectory below.
Rifle, load and configuration. Tap the rifle name at the top to switch rifles. The chips below it
switch between that rifle's loads and between, for example, bare and suppressed.
The quick dope card shows the elevation and wind holds for one distance, in MOA or MIL and as
turret clicks ("U 40 clicks" means dial 40 clicks up). Drag the slider to pick a distance, use
− and + to move by one, or tap the underlined distance to type one, such as a
rangefinder reading.
Table shows the trajectory every few yards out to your maximum range. The highlighted
row is your zero, and red rows are subsonic, where predictions are less reliable. Choose the columns with
⋮ → Table columns, and set the range and step in Settings.
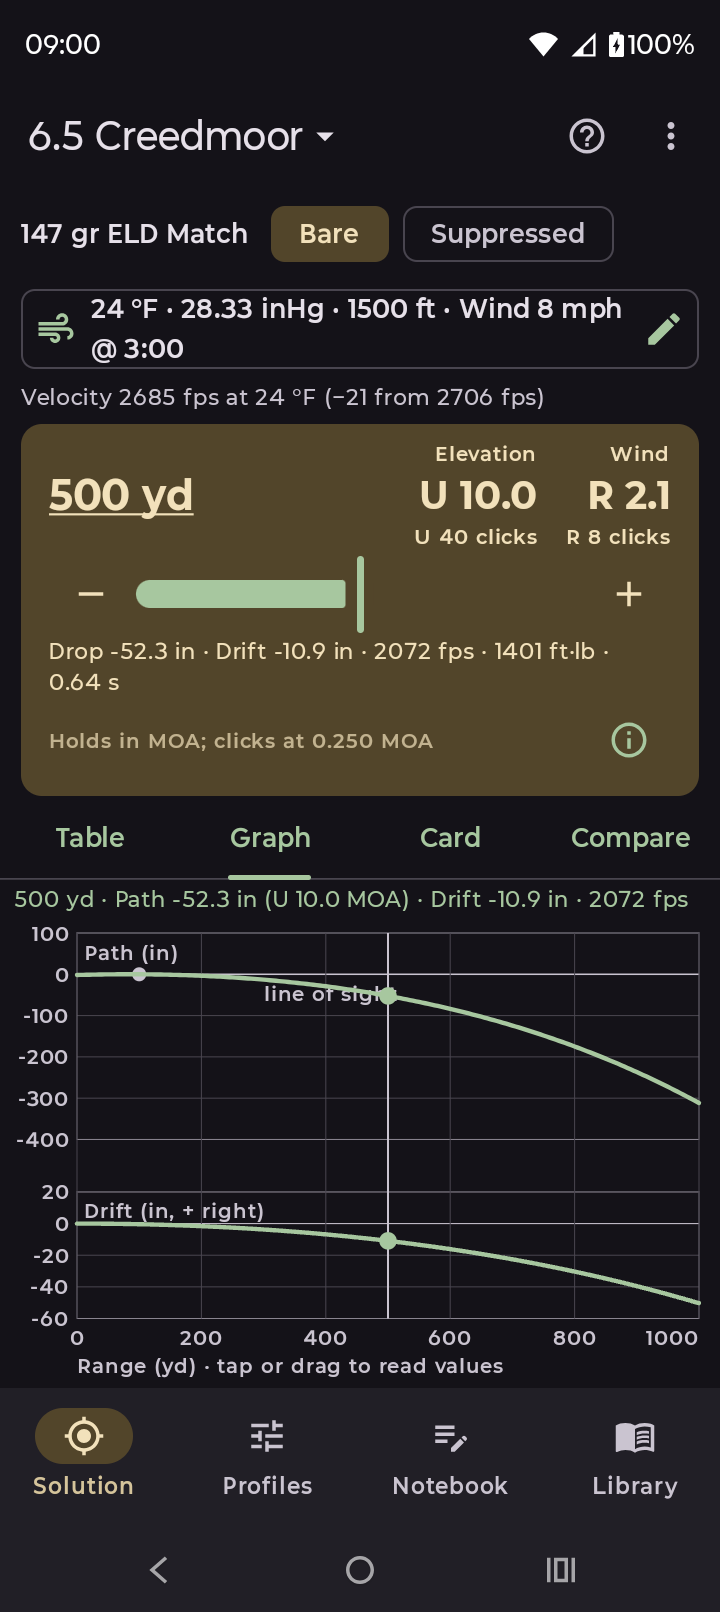
Graph shows the bullet's path and wind drift; tap or drag on it to read any distance.
Turn the phone sideways for a wider layout with the controls beside the results.
The Graph tab.
Conditions
Temperature, pressure, altitude and wind change where the bullet goes.
Tap the bar with the wind icon under the rifle name.
Enter the temperature, altitude, pressure and
humidity. Choose Station pressure if you are reading a barometer on site, or
Sea-level if you are copying a weather report.
Optionally tap Barometer to fill in pressure from your phone, or My location to
fill in altitude and latitude. The app asks for location permission only when you tap it; if you say no,
everything else still works.
Enter the wind speed and the direction it comes from as a clock: 12 is from the target, 3
is from your right, 9 from your left. For uphill or downhill shots, enter the shot angle.
Tap Apply. Standard resets the air to the standard atmosphere.
For very long range, turn on Include Coriolis and enter your latitude and firing direction.
Suppressors and brakes
One rifle, several muzzle setups.
Open Profiles, tap your rifle, and under Muzzle configurations tap
Add.
Name it, choose its type, and enter its velocity change (a suppressor often adds 10 to 40 fps;
use Increase or Decrease) and how far it moves your point of impact.
On the Solution screen, switch between configurations with the chips. Holds, the table, graph and card
all follow.
The configuration you zeroed with is the reference; the others are measured against it. You can also
enter a chronographed velocity for any load with each configuration.
Quick ballistics
A full solution without setting anything up.
Tap the rifle name at the top of the Solution screen and choose Quick ballistics, or tap it
on the empty first screen.
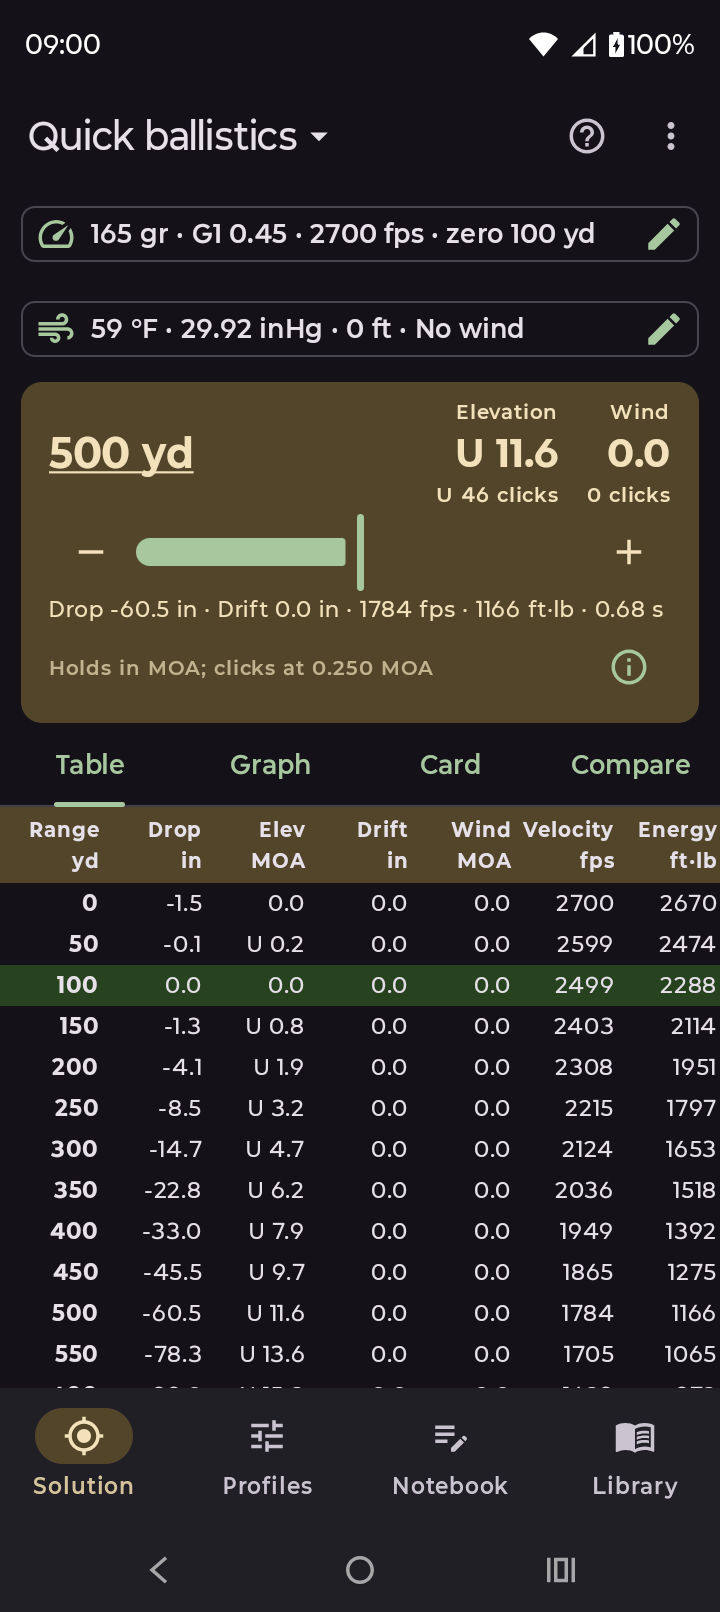
The first time, enter a bullet (or Choose from library), the ballistic coefficient and drag
model, the muzzle velocity, the zero range and the sight height. Tap Done.
You get the same quick dope, table, graph and range card. Tap the bar at the top to change your
inputs; it remembers them.
Quick ballistics has its own conditions, starting as the standard atmosphere, so changing them never
touches your saved rifles.
When you want to keep it, choose ⋮ → Save as rifle.
Quick ballistics: enter a bullet, a velocity and a zero.
Compare setups
See where two or three setups differ.
On the Solution screen, choose the setup you want as A (your rifle, load and configuration), and tap
the Compare tab.
Tap Add a setup to compare and choose another load or rifle, Quick ballistics, or
In other conditions… to see the same setup in different weather.
Each card shows the elevation, drift, velocity, time of flight, energy and subsonic range at the distance set by
the quick dope slider, with B and C showing the difference from A, and what differs in their conditions.
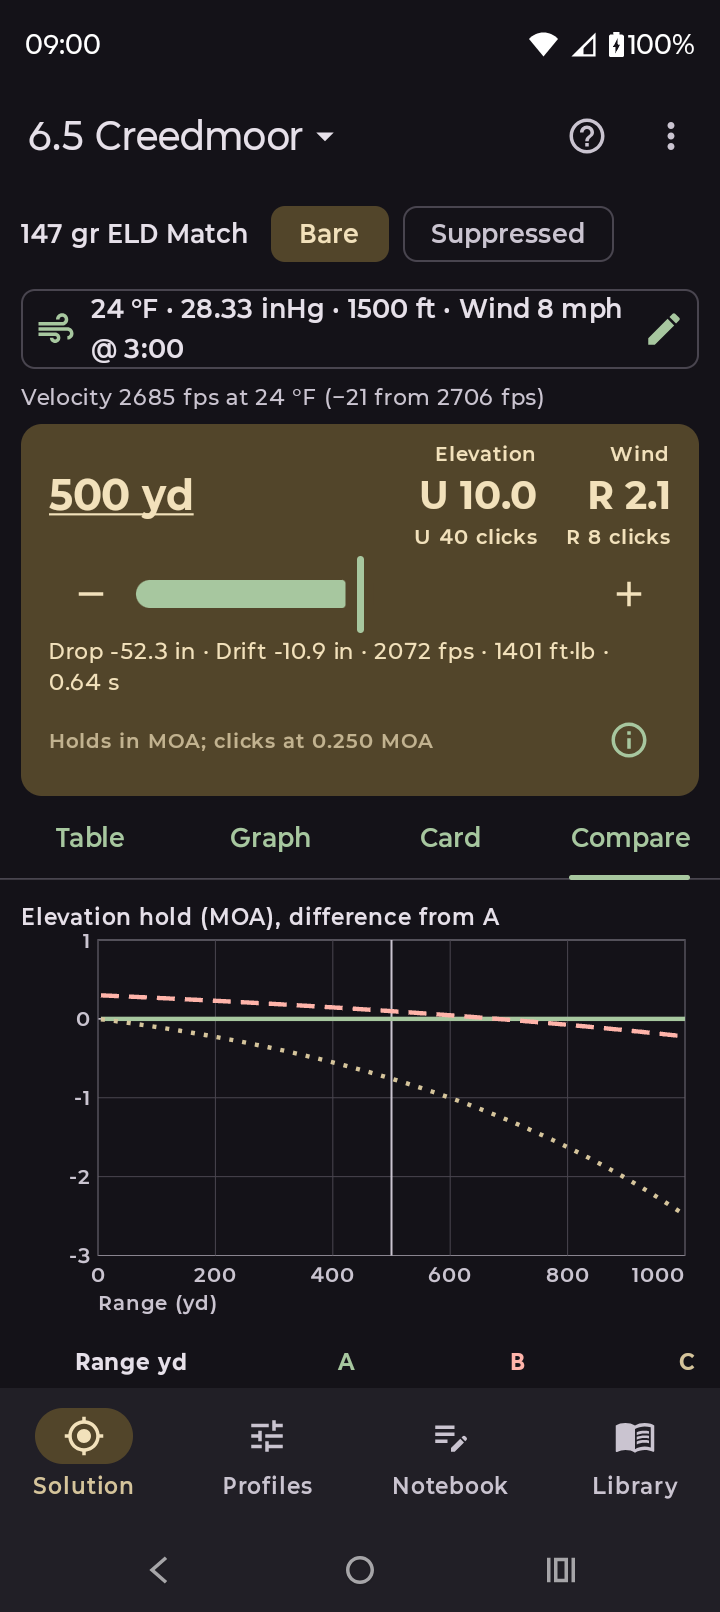
Pick what to compare (elevation hold, path, drift, velocity, energy or time) and choose Difference
from A or Values for the graph and table.
Three setups compared: lines are solid, dashed and dotted as well as colored.
The app's help has four worked examples (Compare, step by step): does a suppressor change my hold,
how much does a cold morning change my dope, which of two loads is flatter, and a quick bullet against a
saved load.
The reloader's notebook
Your own records. It is not load data.
Open the Notebook tab and tap New recipe. Choose the bullet from the library
(so the recipe can be used for ballistics) and enter your components. Use suggested name builds a
name from them, or type your own.
On the recipe's page, tap Add batch each time you load: date, rounds made, case firings and lot
numbers.
Tap Add session to record a chronograph string: choose the rifle and muzzle configuration, the
temperature, and type each shot's velocity (the keyboard's Done key adds a shot). The recipe shows the average,
SD and ES for each session.
To use a recipe in your solution, edit a load and tap Use a notebook recipe. The load takes its
bullet from the recipe and its velocities from the latest session with that rifle, and stays up to date as you
add sessions.
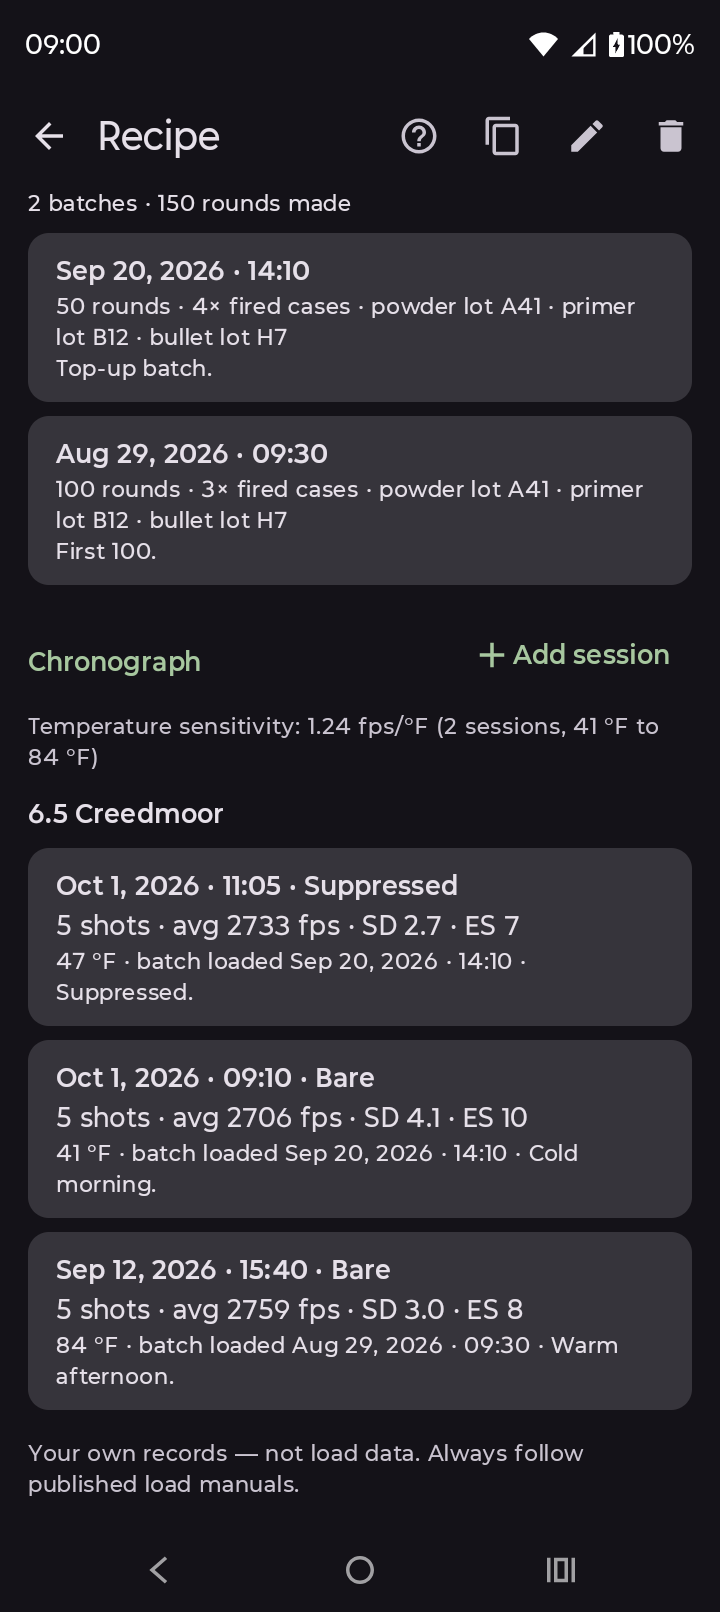
A recipe's chronograph sessions and the temperature sensitivity they show.
The notebook never suggests charges or predicts pressure. Reloading is hazardous: always follow current
published reloading manuals.
Temperature sensitivity
Powder velocity changes with temperature.
Record chronograph sessions for a recipe at two or more temperatures at least 10 °F apart, with the temperature
entered on each session.
The recipe page shows the result, for example "1.24 fps/°F (2 sessions, 41 °F to 84 °F)". A load linked to the recipe
uses it automatically. Or type a figure under Temperature on any load, if you know yours.
On the Solution screen, a line under the conditions bar shows the adjustment, for example
"Velocity 2685 fps at 24 °F (−21 from 2706 fps)", and the table, graph and range card use it.
Range cards
A dope card to print or share.
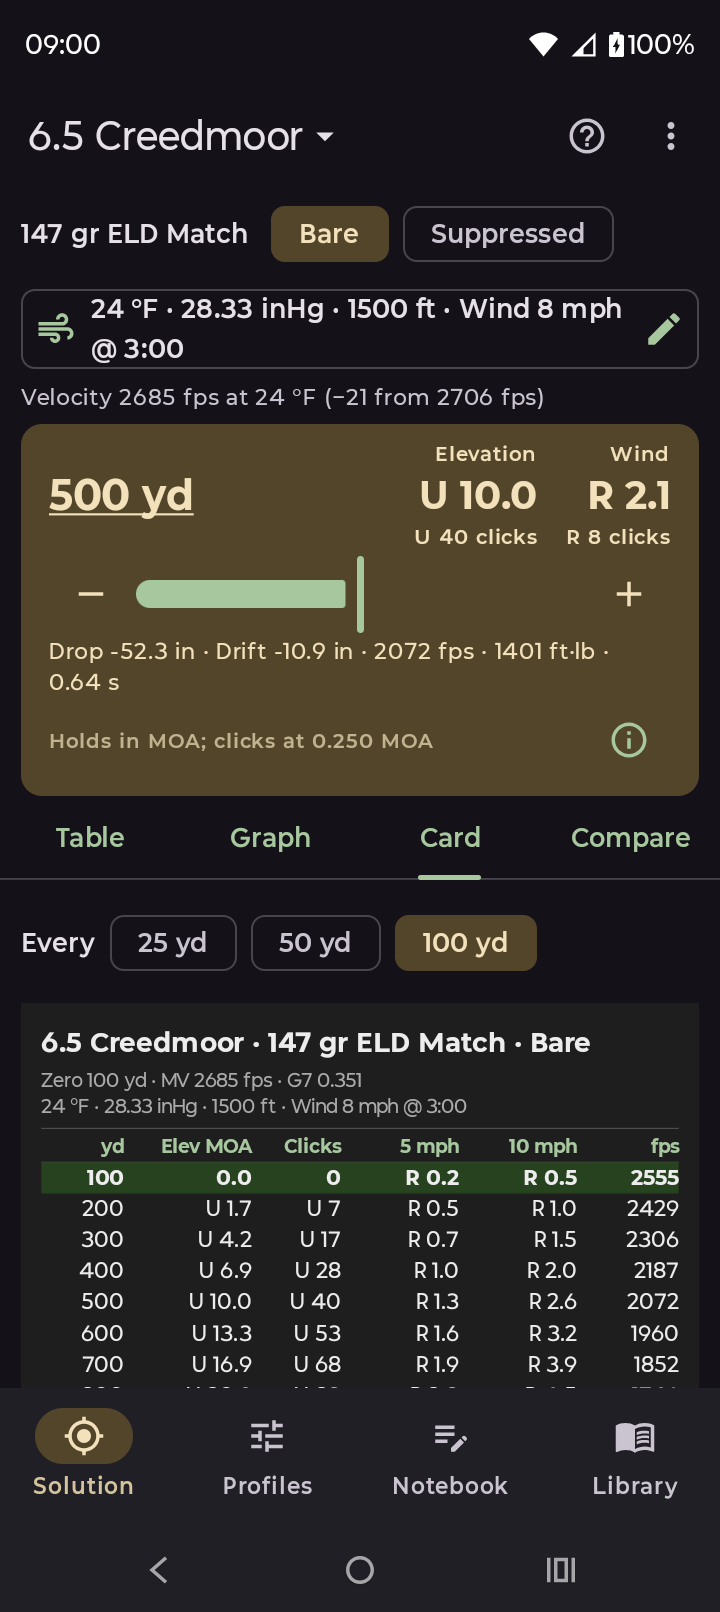
On the Solution screen, tap the Card tab and choose the distance step (25, 50 or 100 yards or
meters).
Tap Compact PDF, Full-page PDF or Image. From the share sheet you
can print, save or send it.
The Card tab, with elevation and 5 and 10 mph wind holds.
The bullet library
Over 1,200 bullets with ballistic coefficients.
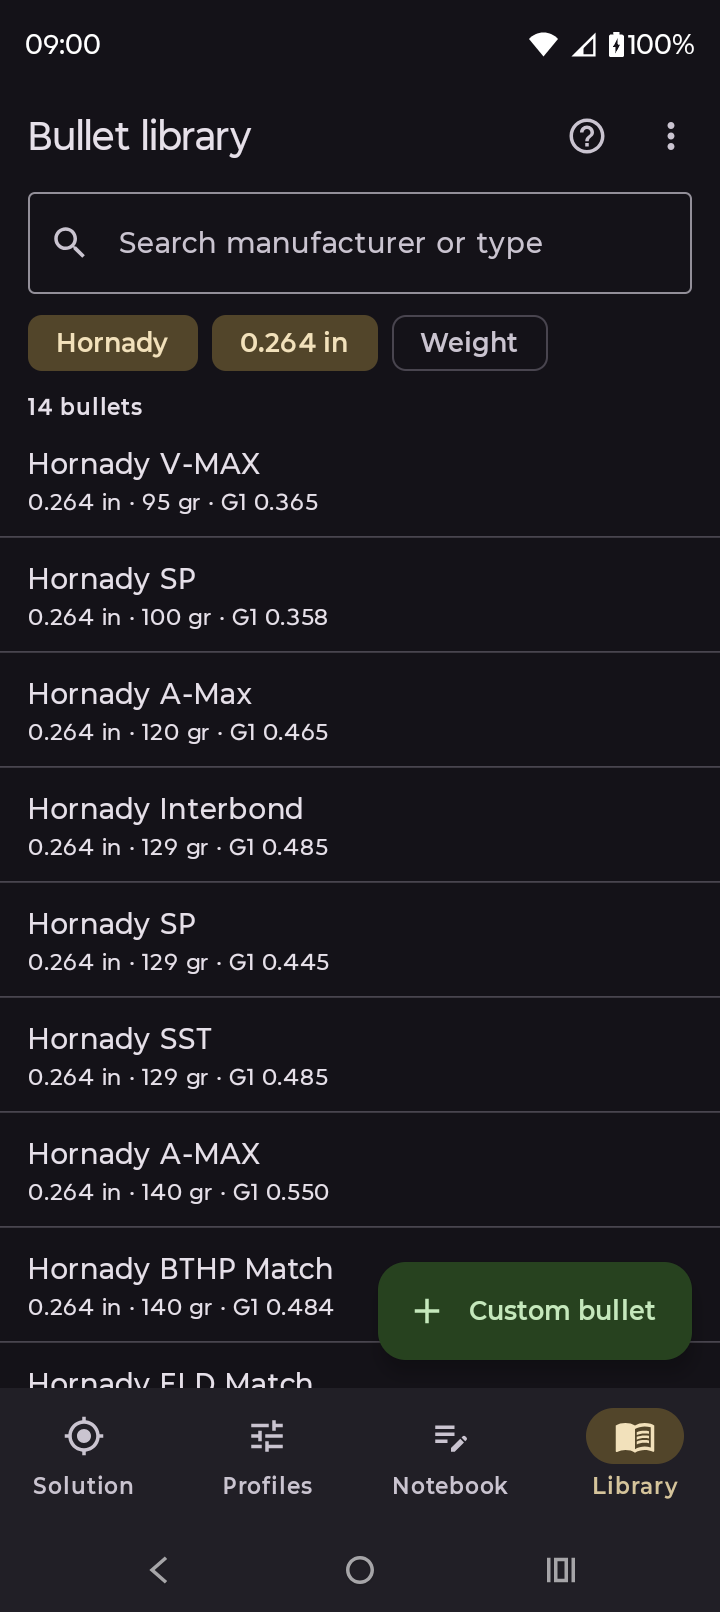
Open the Library tab and search by name, or filter by maker, caliber and
weight.
Tap a bullet to see its data. Custom bullet adds your own, with the maker's published ballistic
coefficient and the right drag model (G1, G7, or RA4 for .22 LR).
Check bullet data against the maker's current information; the library may contain mistakes or be out of
date.
⋮ → Check for catalog update downloads newer bullet data. It is the only time the app uses the
internet.
Filtering the library by maker and caliber.
Backup and restore
Keep a copy, or move to a new phone.
Open Settings from the ⋮ menu and tap Back up to file. Everything is saved to a file
you choose: rifles, loads, notebook, custom bullets, settings and conditions.
To restore, tap Restore… and pick the file. Add keeps what you have and adds the
backup; Replace replaces your rifles, loads and notebook with it.
To share one rifle with a friend, open it and tap the share icon.
Backup files are not encrypted, so anyone who has one can read it. Think before you share it.
 Benchwork Ballistics